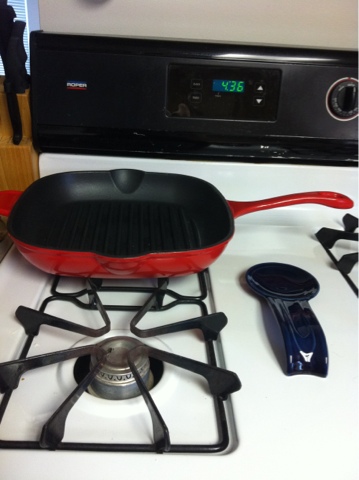
In my last post, I was bragging about the fabulous red hot cast iron grill pan that my parents gave me for Christmas. I mentioned that I would discuss cast iron and how to care for it, so here it is, yall.
Ever since I was a little girl, my mother had a cast iron pan I lovingly called her “Chicken Frying Pan,” also known as a “Dutch Oven.” She would use it for frying mostly and of course, Fried Chicken was a Sunday Favorite along with her Country Potatoes and Seasoned Mixed Greens. As I grew older that same pan was used for,S.O.S. (a recipe featured in one of my previous blogs), Frittatas, Beef Bourginion and a variety of other family favorites. When I was married back in 2007, she passed down her cast iron “Chicken Frying Pan” to me and to this day I continue to use it with care.

That’s the thing about good ol’ cast iron. It never seems to wear out. In fact, it’s like a history of everything you’ve ever cooked in that pan. A medley of flavors! Stainless steel, Aluminum, Non-Stick Coated, and Copper all seem to scratch and scald and over time become unappealing to the eye and the cook using it. They don’t last nearly as long as cast iron and therefore, do not carry the history or sentiment cast iron does. They also have specific methods of cleaning and care to prevent the aging of the metal, scratches, and scalding. Cast Iron, however, is easy to maintain and lasts for decades. It IS slow to heat and slow to cool, but it makes a better environment for meat to rest after cooking and if you have an unexpected guest, your cast iron pan is still red hot!
Typically, when buying a new cast iron pan, they come pre-seasoned, but you can season it yourself to be sure by following the recipe below.
Ingredients:
Damp cloth or sponge
Soapy Water
Dish Towel
Shortening or Lard (Sometimes my family uses reserved bacon grease to season and add a smokey flavor)
Paper Towels
Directions:
First, using a damp, warm dish cloth or sponge, wash your cast iron pan with soapy water and dry with a dish towel. After washing, use shortening or lard and coat the pan. Place in the oven at 325 degrees and let bake for 1 hour. Carefully ensure the pan is coated by wiping down the inside of your cast iron pan again. Let bake for another hour. It should be seasoned. If it is sticky, you make have used too much oil or not “seasoned” your pan long enough in the enough. Adjust time in the oven as necessary.
After it has been seasoned, to maintain you simply wipe it down and use a scraper or spatula to remove any left over crumbs. DO NOT WASH! It may sound weird, but moisture is actually cast iron’s mortal enemy. Moisture causes rust and the oil you seasoned your pan with clogs this porous metal and prevents moisture. However, if it is rusty, you can remove the rust by using an S.O.S. pad and scrubbing. Then, be sure to reseason your cast iron pan to prevent any further rust or damage to the pan.
My grandmother had this rusty old Lodge cast iron dutch oven that I never, in a million years, thought was salvageable. My husband insisted on cleaning it up and after hours of scrubbing with an S.O.S. pad, it looked brand new! So if you come across a old rusty cast iron pan at a yard sale and are not willing to pay for new cast iron, a used, well-seasoned cast iron pan is great for beginners. Otherwise, scrub-a-dub-dub and season and you’re done!
Currently, I own three cast iron pans: one Lodge Dutch Oven, one Lodge Small Frying Pan, and one Kitchen Living Grill Pan. They can be used on the stove top, in the oven, and on the grill.
Some people will tell you copper, aluminum, or stainless steel is the best cookware you can buy. Some will complain that cast iron is too heavy, but let me tell you folks. Cast Iron is heavy metal. That’s part of why it lasts. Now that you know how easy it is to care for, below is a quick easy recipe to get you started cooking with your own piece of “heavy metal.”
Bauble’s Pan-Fried Ham Steak
Ingredients:
- 1 Ham Steak (Mash’s or Cook’s will do.)
- 1 to 1 1/2 cups orange juice
- 1 to 2 cups sugar
- 1 Tbsp Cinnamon
- 1 tsp Nutmeg
**Optional: Sometimes I add a little Jack Daniels for flavor. It gives this dish a slightly smokey flavor and enhances the notes of cinnamon in the orange glaze.
Directions:
Sometimes Ham Steaks are precooked and only need to be warmed in a cast iron skillet as you make the glaze. (further directions below) However, if your ham steak is not precooked, coat skillet with a bit of vegetable oil and pan fry ham until done.
Once your ham is fully cooked, add 1 to 1 1/2 cups of orange juice to cast iron skillet. It should cover the ham steak completely. Add sugar, cinnamon, and nutmeg and stir constantly. Stir until the mixture becomes a sticky, sweet syrup. Serve immediately or refrigerate and eat within 1-3 days.
2-4 Servings
**My family love this simple glaze recipe and tend to like more glaze than what’s good for us. If you want to keep this somewhat healthy, cut the orange juice, sugar, cinnamon and nutmeg in half. It will have the same flavor, but only should make what you need for two servings rather than what we, as a family, enjoy. We enjoy a little excess. 😉
